Thursday, 8 September 2016

Tips and Tricks #10


A chore all beauty lovers hate is cleaning their brushes however, having clean brushes is just one of the best things. Considering the amount of brushes we all use, it gets to that point when you literally have no clean ones left and simply have to go through the cleaning process.

Ages ago, when I went to Paris, I picked up their Daily make up brush cleaner which has really helped cut down the time it takes to clean my make up brushes. It comes in a small handy travel size, although I believe they also do a larger bottle. It's a simple spray which you spray directly onto your make up brushes. I then use either a muslin cloth or a flannel and swish my make up brush around in circles. It's quite satisfying seeing all of the make up come off your brush onto the flannel. I keep reapplying the spray and swishing my brush round until no more make up comes off on the muslin cloth. It really is that simple and easy and honestly cuts down the time spent actually 'washing' your brushes in the sink.

I can't fully remember the price of this product, but I'm pretty sure it was really affordable. Of course the only trouble is ordering from Sephora but if you're close to making an order, then quickly pop this product in your basket, you won't regret it!
SHARE:

Thursday, 28 April 2016

Tips and Tricks #9


Foot care is something that's not spoken about very often, as let's be honest it's not the most pretty thing to talk about or even do. With working in socks on a kind of hard flooring it doesn't do my feet much justice and the poor beggars are suffering from dry, hard skin. I wanted to try something pretty low maintenance and easy to achieve and I think I found just that.

So pretty much every evening, unless I forget, I wear these socks to bed, attractive I know. I've had these ones a while now but you can buy them from Boots I know and they are pretty inexpensive. Basically what I do, is whack a load of moisturiser on my feet and then pop the socks on, and done! Yes it really is that easy. There are probably better moisturisers you can buy, specifically for your feet, but I have so many moisturisers from gift sets that I need to use up that I thought this is a great way to use them up.

I must say this isn't an overnight process, you have to give it a while to see any results, as you do with most beauty products but I can assure you it does work. It makes my feet feel so much smoother and the hard skin not so hard. The only thing you have to get over is wearing socks to bed which I know not everyone likes. There have been a couple of times when I must have taken them off in my sleep and awoken with them on my bed side table totally and utterly confused!

Overall though this is a great, inexpensive way to getting Summer ready feet if you like. It's also a great way to use up those moisturisers if you're like me and have a load stored away!
SHARE:

Monday, 11 April 2016

Tips and Tricks #8


Firstly I apologise for not posting one of these blog posts in quite a while, a long time in fact. But to be honest I think I just ran out of current ideas and didn't want to just post any willy nilly so I went away and had a good old think. I've now got another few ideas behind me so these posts will now run again, hopefully continuously but there is always the chance I could run out of ideas again. Sometimes I like it though as it actually makes me think about what I want to post on my blog, a little time to refresh my mind. Anyway I'm back with another Tips and Tricks post for you guys!

A few weeks back I was shopping with my mum and sister and my sister was saying how she swears by these gloves and they've really helped the appearance of her legs. It must be a family thing, although I know others will suffer with this too, but we tend to get dark spots on our legs particularly after shaving them. My sister said I should buy some of these exfoliating gloves as they have helped her legs and nearly stopped these patches on her legs. As soon as she said that I had them in my basket and was at the till. I do often hate the look of my legs so if this little trick helps the appearance then I'm all over it.

I've been using these gloves alongside this scrub from Garnier but you can obviously use whichever scrub you like, it doesn't have to be this one. Although I've actually really been enjoying this one, it smells great and is really invigorating. When I first started making this part of my routine, when having a bath, the first thing I noticed was how soft my skin was feeling and that was before I had even moisturised! I did then moisturise as well as I didn't want the scrub to dry out my legs even more and obviously this helped a treat. I try and do this every time I have a bath and as I said make it part of my pamper routine if you like. It's really been helping the appearance and feel of my legs and is such an easy step to add to my routine.

I absolutely am converted and love using these gloves. I will also be using them when it comes to Summer and when I begin to fake tan more than I am at the moment. These particular gloves by the way are from Superdrug but I'm sure there are many other place that sell them. I hope you enjoyed this new Tips and Tricks post :-)
SHARE:

Thursday, 8 October 2015

What I've Learnt From Blogging So Far

Image sourced from Pinterest
 
In the years I have now been blogging I've never actually written any type of post like this. I know a lot of top bloggers have written posts about how they got to where they are and their personal tips and tricks. I have also seen and read a lot of these posts recently, which is kind of what spurred me on to write my own. I'm by no means the greatest or most dedicated blogger but I'd like to think that I've learnt some useful tips which may help any of you who are relatively new to blogging.
 
 
1. Don't stress
Personally I'm prone to stressing about pretty much anything so for me I find this one particularly hard, some of you may not. I don't like the feeling that I haven't produced something for you guys to read, for any reason, therefore this produces me to stress over it. I have however learnt to not stress as much. It's my blog therefore I can write and publish a post whenever I want. I tend to try and schedule a post every two days but there are times that this doesn't always go to plan. I can plan as much as I like but sometimes finding the time to actually write the posts can be tricky. I work full time and am also now in my final year at university so juggling the two can be difficult and time consuming. So my life is stressful enough without stressing over my blog. Basically I have learnt there is no point in stressing over your blog. It's yours, you've produced it, you've made it on your terms. If you want to miss a blog post out in the week then do it, if you want a week off let your readers know and go and recharge!
 
2. Remember that certain things take time
I have definitely learnt this one and it has taken me many times to get to grips with this one if I'm honest. Some blog posts will of course be easier to write than others but when they are rushed then I believe you can tell. I've 100% rushed many posts previously and when I've read them back, I've thought "wow, that doesn't even make sense!". I believe that if you're not in the right frame of mind to write a blog post, then don't. Your readers want to read good quality posts with a truthful review, or whatever it may be. This can also link into photos that you upload on your blog. I must say that this is something I lack and I think it's because I don't own one of the huge proper photography cameras, which of course I'd love too. I simply just use my iPhone which is good enough quality but obviously nothing on the good cameras. But the editing process can take time so again don't rush it as it's going to be something that stays on your blog forever, pretty much.
 
3. Make it your own
This one is pretty self explanatory - I've seen bloggers have their content taken and used by someone else which of course is not nice. Bloggers, including myself, take time to write and edit their content which is published on their blogs. You gain absolutely nothing from copying and pasting from someone else's blog. Putting your own personality and writing style into your blog is what makes it your own and therefore separates you from every other blogger. It gains you readers as people will understand you as a person and as a blogger.
 
4. Vary your content
Again this one is pretty obvious, personally I like to read blogs that showcase a variety of posts. Including reviews, lifestyle, fashion, life snippets, wish lists, etc. I'll say it again - it's your blog so make it your own but incorporate a variety of posts to keep your readers reading basically. Again some posts will take longer to edit and write than others but that shouldn't stop you, unless you literally have no time. Personally I find wish lists can take longer than most other posts but that doesn't mean I don't write them it might just mean that I don't do them as often. Variety keeps readers interested and will attract new ones. This also links to point number three as you vary your posts continue making them your own.
 
5. Do what you want, when you want, how you want
Finally I feel the most important and I have touched on it already. It is your blog, you can run it however the hell you wish too. If you want to run a blog focused on one area or you want to incorporate every area, then do it. Don't hold back when it comes to something that you have built yourself, from scratch. As I've said if you want to take a week off, then do, no one is there to tell you not to. You are the boss of your blog and you control it. It doesn't matter what other bloggers are doing; some bloggers post daily, some monthly but you should post when you see fit. As I've said I try to post every other day but if that doesn't work out for me then I've learnt not to stress about it and just continue with my life. I know I will next post when I'm ready to and when I have the time. Your blog should be something you love, not something you love to hate. You should want to post, interact with your readers and love it. 
SHARE:

Monday, 3 August 2015

Tips & Tricks #7


This is a pretty recent new tip that I have picked up but I really am loving it so much that I couldn't hold out much longer and therefore needed to share it with you. I've read a lot about clarifying shampoos recently and how good they can be for your hair. I had never tried one before but when I had to purchase a few other bits from Boots I thought I would pick one up and try it.

So from what I've been reading the aim of a clarifying shampoo is to deep clean your hair and get rid of all of the nasty stuff. I also read that you're only supposed to use this once a week, not entirely sure why but I've been sticking to that roughly. I've been using this shampoo for a few weeks now and have been loving the results on my hair. There's nothing special about using this shampoo, it's just like any other, but the way my hair feels after using this is amazing. It leaves my hair feeling super soft and squeaky clean. I have also found that when I use this my hair doesn't get as greasy as quickly therefore I don't have to wash it as often when it's the time of the week to use this shampoo.

I'm unsure whether there are other clarifying shampoos out there on the high street as on the Boots website I could only see this one. I'm sure there are and I'm just unaware of them so if you have any recommendations let me know. But this one from Pantene definitely seems to be doing the job and it was only around £4 for this large bottle. Considering you're only using it once a week as well means that it's going to last a long time.

Overall I love this little tip and it has worked wonders on my hair. I will continue to use this and repurchase another clarifying shampoo after this one. I love that my hair feels so soft with the use of a shampoo as I find that's normally the conditioner or mask you apply to your hair. But when I'm using this shampoo I just use a small amount of conditioner and no mask as it really works. Let me know if you've ever tried a clarifying shampoo and your thoughts on them :-)
SHARE:

Wednesday, 24 June 2015

Tips & Tricks #6


Number one I apologise for the ever so slightly dirty sponge pictured, I think it may be about time that I invest in a new one as I do love it very much. Number two I apologise for the lack of Tips & Tricks posts recently, it's actually pretty hard to think of new ones that often if I'm honest. So I'm trying my best to think of new ideas and keep up to date with these posts as much as I can.

Now since I began starting to get really dry skin using my hands to apply my foundation just wasn't doing anything for my skin. It meant that I was rubbing the foundation over the dry patches and it just made them flake. And I can tell you now, flaking face is not an attractive look. In my stash I found this sponge from Real Techniques and thought I would give it a go. I'm going to be honest again and to begin with I was using this sponge dry and yes I thought the results were ok. Until I realised that a much better way to use this type of sponge was to wet it before use.

I then started wetting the sponge before I then went on to use it to apply my foundation and my oh my the results changed. It honestly helps my dry patches so much more and is such a good way to apply foundation. The results do not leave a full coverage look, which yes sometimes I do want, but for an everyday foundation application I absolutely love it. It sets the foundation over my dry patches really well and doesn't effect it as much. My foundation doesn't cling to my dry patches when using this sponge wet and definitely doesn't cause any flakiness like I was experiencing.

If your skin type is anything like mine, dry, then I would definitely recommend trying out a sponge and make sure you wet it before you use it. I honestly use this sponge daily, other than nights out when I want a more full coverage look. I will also be investing in a new one of these sponges very soon and you can buy them from Boots here for only £5.99 which is such a bargain. Let me know any of your Tips & Tricks for dry skin in the comments :-)
SHARE:

Monday, 25 May 2015

Tips & Tricks #5


Firstly I have to apologise for the (very) old pot of Sudocrem I own, I think it's about time I invested in a new one but for now we will put that to one side and move on. Anyway another tip/trick for you today which is another one for you blemish prone skin people alike to me. I apologise if you don't have spot prone skin but I feel everyone gets spots at some point so hopefully these tips and tricks help you in some way at some point!

Anyway if you've never heard of Sudocrem then (well I'm sure you have) but if not then you've been hiding for some time. Yes it's mainly advertised for babies and nappy rashes but it has many other benefits as well which just aren't that hyped up. In very small writing on the front of the tub it does state that it helps acne and that's what I'm going to be talking about.

Now you know those very large, very red and very painful spots you get... well that's where this product comes in. I find this product helps those particular spots very, very well. I'm not saying it doesn't help other spots as well, I just find that it definitely helps those ones the most on me anyway. But everyone is different so you'll have to give this product a go on all types of spots and see what works best for you.

The best way to apply this product is at night, just before you go to sleep. The main key to this product is to not rub it into the spot fully. It works best if you apply it directly to the spot(s) and not too thin or too thick. Then just leave it, do not rub it in to the spot, just simply blob some onto the affected area and leave it. Yes you may look funny, hence why you apply it last thing at night, due to potentially having many white blobs all over your face.

Then when you wake up in the morning the Sudocrem will have absorbed into the spot. Firstly this leaves the spot(s) less red and less visible. Mainly this means less painful which is so much better, I mean when a spot is painful it can be really painful. But the fact that it's much less visible and red means that it's much easier to cover up for whatever you may be doing that day. The Sudocrem also leaves the spot hydrated which is such a great plus. Spots can get very dry with all of the spot treatments you have to apply so it's nice to be able to apply something to them which can actually help hydrate them slightly.

Overall this is a great go to product when it comes to those particular type of spots and the tub honestly lasts ages. You can purchase different sized pots too and it's really affordable so if you want to give this product a go then it's definitely worth it and won't break the bank. This is just one of those products which is great to have in your skin care stash as it is an all rounder product. It's also such an easy product to use, just quickly applying before you go to sleep, so definitely doesn't waste any time! I hope you're enjoying the long bank holiday weekend :-)
SHARE:

Friday, 15 May 2015

Tips & Tricks #4


Coconut oil was a raved about product about a year or so ago within the blogging community. To begin with I didn't know what all the fuss was about but when browsing in Superdrug a while back I noticed this in the hair care section. It was relatively cheap so I thought what the hell, I'm going to give it a whirl and see what all the fuss is about.

When I first opened this I was like what on earth have I brought? It's a hard block not an oil! Little did I know hey. I instantly started using this product and fell in love with it. I apply this to towel dried hair after washing it. It can be quite tricky to get product out of the tub, especially when it's cold, but once you've got a small amount out I simply rub it between my hands and it turns into an oil. You honestly need the smallest amount as the oil can work up your hair and leave it feeling greasy.

The next morning the ends of my hair feel super duper smooth it's crazy. I do have very dry ends and this works wonders on those. I also have very tangled hair and this product really helps with that as well. If you have the same kind of hair as me then this product will be a saviour to you. It's the most simplest hair care item as you literally put it onto the ends of your hair and then leave it in to work it's magic. I also believe you could apply this to dry hair to tame the ends of your hair if you feel it is needed.

This is such an all round product and such a simple tip to add to your hair care routine. This tub has honestly lasted me so long already and I'm only half way through. It's such a like investment product as it's cheap and still lasts such a long time. If you've never tried coconut oil on your hair before then I would definitely try it out as it will really help the condition of your hair. Let me know if you've tried coconut oil on your hair and your thoughts :-)
SHARE:

Thursday, 7 May 2015

Tips & Tricks #3


I'm really enjoying writing these tips & tricks posts, and you guys seem to be, so I really hope you are as much as I am! They are just simple little things that I have learnt myself or advice given to me from people I know and I enjoy sharing them with you. I also hope they are in some way helping you guys as well as they have definitely helped me in some way throughout time.

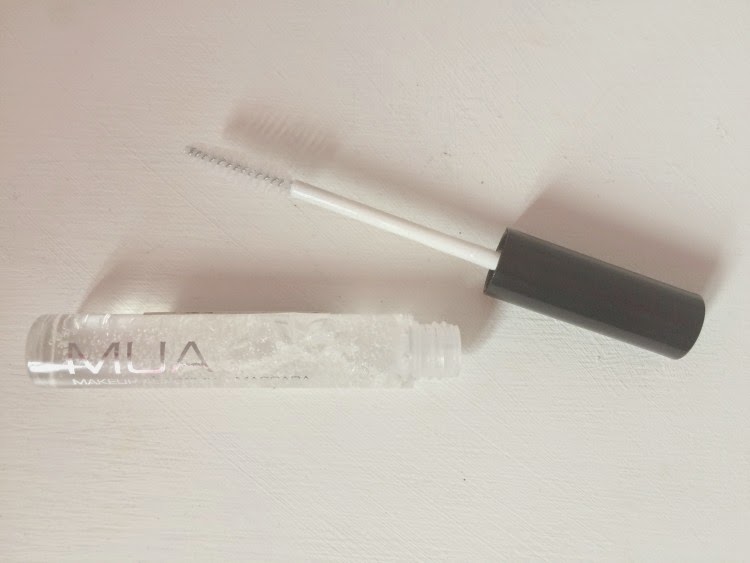
I can't even begin to tell you how long I've been using clear mascara simply because I have no idea myself. But it has been a mighty long time and now I wouldn't go a day without using it now. Now I'm not sure if clear mascara has any benefits when using it by itself but I very rarely do that unless I'm going out but cannot be bothered to put normal mascara on. I will just add that it's very rare these days to find a clear mascara on the high street. I came across this one a couple of weeks ago in Superdrug from MUA for £1 and it works just as well as any other. So it doesn't matter what make up brand you go for as I find them all to work the same as one another.

My simple routine just involves an extra step which is where this beauty comes in. I simply just apply this mascara before my normal black mascara, yes it's that easy. There are many reasons why I do this which I will tell you now. Firstly I find that it helps my mascara stick and hold onto my eyelashes much easier but also for longer. I think this is a great tip if you sometimes suffer from your mascara dropping down under your eyes because most of the time I find this helps me. Sometimes it can be the black mascara that you are using but most of the time this helps a lot. Another reason is that I find it keeps my black mascara working for longer. So when it starts to become slightly dry and as if you want to throw it away, because you're still using a clear mascara which still has life left in it, then it prolongs the life of your mascara. Finally it enhances your black mascara as well, I find depending on the mascara but it definitely helps with lengthening and thickening my lashes.

Overall this is now dead set into my make up routine and will continue to stay there. If you've never tried a clear mascara before then I would definitely recommend doing so, especially as this one I've been using recently is only £1, you really can't go wrong with it! Let me know if you've tried this tip before :-)
SHARE:

Monday, 27 April 2015

Tips & Tricks #2


The second in this, I guess you call it series, of tips and tricks. If you didn't see my last tips and tricks post then you can view that here, where I talked all about baby oil and what you can do with it. Today I wanted to share something that my sister actually recently told me to do. Again it may be something some of you already know but it was new to me so I wanted to share it with you guys in case you don't know.

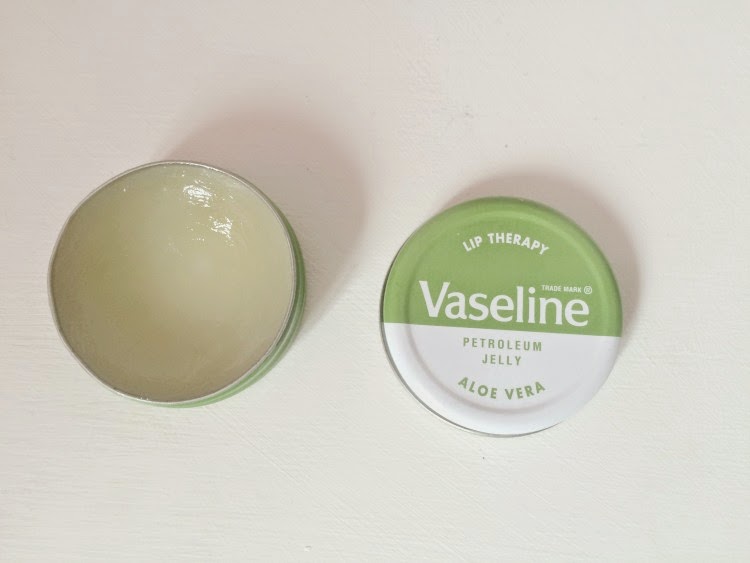
You're probably thinking Vaseline? What can you do with that? When my sister told me to use this, I was like seriously? But I trusted her, did it and voila it worked well. The suspense must be killing you! If you've been reading my blog for a while then you'll know I suffer with blemish prone skin. It just so happened that when my sister was round a couple of weeks back, I picked one of my pesky spots. Yes I know that's naughty but you know when you do things that you sometimes don't even realise you're doing? Well that's what I done.

Anyway immediately after picking it, it of course started to bleed. Oh boy, this spot was not going to stop bleeding for a long time either. I'd gone through a tissue and decided to come downstairs and was planning on just holding the tissue on it. This is when my sister said "go and put some Vaseline on it"... What? Yes you read right, so off I went back upstairs to my bed side table and popped some Vaseline right onto my spot.

Honestly it stopped bleeding basically straight away, I was shocked. I couldn't believe through all of these spots I've suffered with I didn't know this little trick. So instead of holding a tissue over my face, I now know to just use a small amount of Vaseline on it. You don't need a lot, it doesn't sting at all and works pretty much instantly. I think this is such a great tip and since then I've been using this little trick.

Overall I'm thankful that I now know this tip and will continue to use it in the future whenever I feel the urge to pick a spot that then wants to bleed like a ocean on my face. It's such an easy trick as well as I'm sure most of us girls carry a little tin of Vaseline everywhere with us, or there's a useful one laying at home. I also don't think it matters which Vaseline you use, I'm currently using the Aloe Vera one and it still works like a gem. Have you ever heard of or tried this tip? Let me know! :-)
SHARE:

Friday, 10 April 2015

Tips & Tricks #1


Having two nieces and two nephews means my home is often full of baby bits for when the come and/or stay over. Baby oil is one of those items and I have a great new use for it that I wish I knew sooner. I will put it out there, I haven't thought up of this tip on my own, you may already have heard of it. But it has really helped me recently so I really wanted to share it with you guys in case you haven't heard of it before.

I suffer with really dry legs and I have done for a really long time. It comes to a point that when it's time to shave my legs it can be painful. Not during shaving but afterwards. They become super itchy, red raw and flaky. It's really not a nice experience and with the warmer weather coming I need to do something about this. That's where baby oil comes into it... An oil is great for locking in moisture all over your body. So recently I've been shaving my legs with this Johnson's Baby Oil and boy has it made a difference. It has honestly changed my legs for the better, also my shaving experience. It's super easy to do and a lot less messier than shaving gel which is a bonus. I just use it exactly the same as I would have done a shaving gel and it works just as well.

My legs feel moisturised, they are not painful and my skin is not shedding. It's such an easy change and great tip that I couldn't not share it with you. So if you're like me and suffer with super dry legs then go and buy yourself some baby oil. It honestly works so well I couldn't believe it. I will now forever continue to use an oil over a shaving gel and now my legs will be summer ready. Now where's the fake tan?!

Feel free to share your favourite tip and tricks in the comments so that everyone can have a read and help each other out :-)
SHARE:
Blogger Template Created by pipdig